Many businesses handle lots of documents and a lot of repetitive tasks each day and this may slow down the processing processes.
You can decide to automate your accounting task and all other processes in your business to make your work easier and get results in a timely manner.
Microsoft Excel has a range of features that can help you with any task. The excel engine can handle large data sets which need to be sliced and diced in various options. One of the essential features used to automate data is macros.
Excel allows you to import data from your database and create Macros to automate tasks and simplify your work.
Using macros to automate the task
Excel macros are programs created to perform repetitive task and save you a lot of typing time.
You can find the macro command from the Developer tab in the menu bar. The Record Macro command button allows you to create a customized mini-macro program to handle large volumes of data. If the developer tab is not in the menu, you can add it from the file option.
How to add developer tab
- Click on File then choose the options tab.
- On the excel options, the dialog box choose Customize Ribbon
- Under the Customize the Ribbon list box on the right side of the opened dialog box, select the Developer checkbox under Main Tabs to activate the developer tab
- Click ok
Recording a macro

2. Go to the Developer tab, under code choose a macro. You can also open macro from the view tab by clicking on the macros command button drop-down list then choosing record macro.

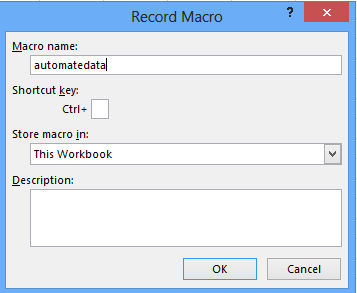
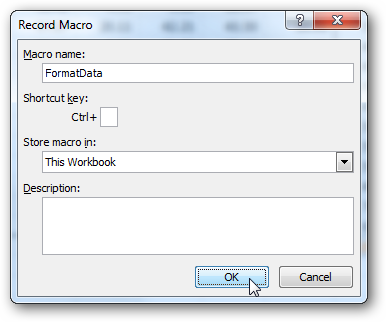
3. On the open dialog box, assign a name to your macro and click OK

4. Shortcut key
You can create a custom shortcut on how you want to open the macro. This is optional, you can create the shortcut or leave it blank.
5. Store macro in
You can also specify storage options if you want the macro to be stored in a different location and be available when you open excel.
This is done by selecting Personal Macro workbook and excel will automatically a hidden personal macro workbook.
6. Description box
The description box is optional. You can give a brief description and then click OK. Once you click OK, all the actions you do on the workbook are recorded.

7. Perform excel actions
You can now start performing the excel commands or tasks you want to be recorded. Use can use various excel commands to perform your task like using the Today() function, If(), Product(), or any other excel function. All the tasks performed are recorded in the macro.
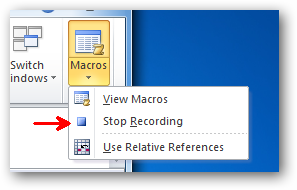
8. Stop recording
Once you're through with the tasks, go to the Developer tab, under the code group, choose stop recording.

Working with recorded macros
-
In the Developer tab, click on the Macros to view the macro and its associated data in the workbook.

- Specify the macro name and click run
For advanced macros, you can incorporate VBA into your macros.
