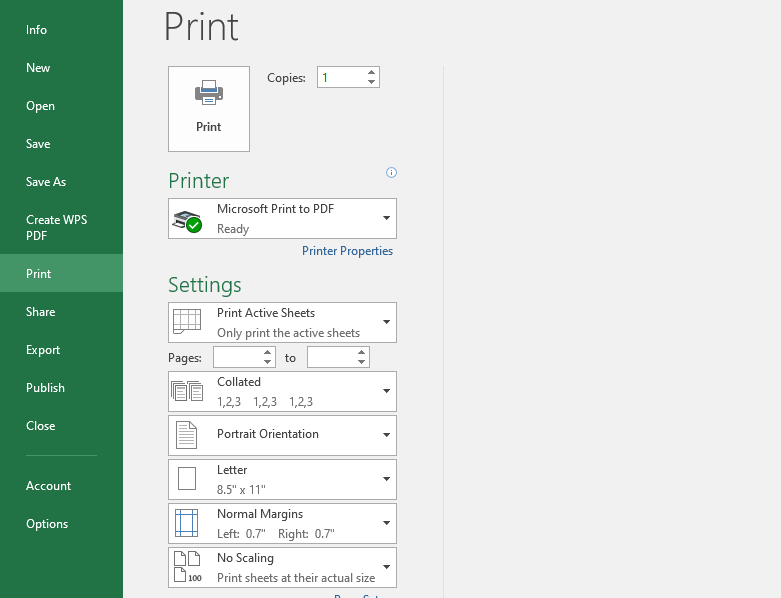
We can print a worksheet in excel just like we can do for word documents.
1. Previewing before print:
It is always advisable to preview an excel document before the actual printing of the document. This helps one correct error and make changes where necessary. To preview a document in excel:
Procedure:
1. Open a saved worksheet.
2. Select the File tab.

3. Navigate to the Print Option.

4. A dialog with print options will appear.
The dialog will be separated into two, the print options area and the print preview area.

5. Observe the print preview area to see exactly how the worksheet will appear when printed.
2. Using quick print:
If you have already previewed a document, you can then proceed to print the excel document. Note that, you should always preview a document before printing so as to correct layout problems before printing.
Procedure:
1. Navigate to the quick access toolbar. Click the drop down menu.

2. Search for the quick print option among the drop down menu items.

3. If there is no "quick Print" option, then click on Customize quick access toolbar. Then add the quick print option.

4. If the quick print option is available, then click it.
5. The Printer should now start printing. When done, retrieve your document comfortably from the printer.
3. Printing in backstage view
The backstage view offers more global settings and configurations for your documents. This includes print options. To navigate to the backstage view. This is done by clicking on the File menu tab.
4. Defining a print area:
We can print some parts of the worksheet instead of the entire worksheet. A Print area is thus a section of the worksheet within which we want to print. To set a print area:
Procedure:
1. Select the Page layout menu tab.

2. Move to the page Section.
3. Select a group/range of cells using the mouse (highlight) or keyboard (shift+arrow key)

4. From the menu, Click the print area drop down and select a set print area. The name of the selected cells Will now change to the Print area.

5. Navigate to file and click print. Look at the print preview section and note that only the selected cells will be printed.
5. Printing individual worksheets.
We can also print a single worksheet from a workbook.
Procedure:
1. Select a worksheet by clicking on its tab.
2. Select the File menu tab and click print. NB: if you had tried the procedure for defining print area, you won't see the preview for your entire worksheet. So you will need to "clear print area" under the page layout tab in the print section.


3. From the settings pane in print options, select the "print active sheets" dropdown. From this section, you can select as many options as you wish.

4. To start printing, you can now close click print when done with print settings.

6. Printing multiple worksheets:
The procedure is almost the same just that you select multiple worksheets before printing.
To select multiple worksheets, Press Ctrl and select the tabs of the corresponding worksheets you intend to print. Then click Print to start printing.
7. Printing the entire workbook
1. Navigate to the File tab.
2. Click Open and select your workbook
3. When the workbook launches, click on the file again and then select print.

4. Ensure that the "print entire workbook" under the print settings is selected.

5. Preview and print.
