
The Excel History is a feature in Excel that allows users to monitor the recently opened Excel documents. It shows the time and dates details when the document was last opened. This tool also allows the user to easily. reopen the document. This article will discuss some of the workarounds related to Excel History.
To check Excel History
A] Using the File Tab
Here are the steps to follow:
1. Open the Excel document.
2. Click on the File tab on the Ribbon located on the leftmost side of the screen.

3. Click on the Open button to open the Open pane. From this pane, click on the Recent button.
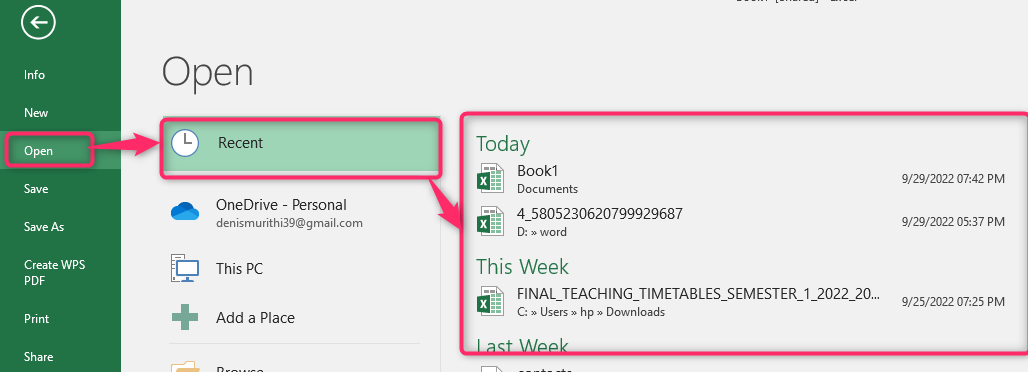
4. All the Recent Opened Excel documents will be displayed on the Right pane.
B] Keyboard Shortcuts
Method 1
Here are the steps to follow:
1. Open the Excel document.
2. Press CTRL + O keys to open the Open pane. All the Recent Opened Excel documents will be displayed on the Right pane.
Method 2
Here are the steps to follow:
1. Open the Excel document.
2. Press the ALT + F keys to open the Info screen.
3. Press the ALT + O keys to open the Open pane. Then, press the ALT + R keys to choose the Recent option. All the Recent Opened Excel documents will be displayed on the Right pane.
To open Excel Document from Excel History
Here are the steps to follow:
1. Open the Excel document.
2. Click on the File tab on the Ribbon located on the leftmost side of the screen.
3. Click on the Open button to open the Open pane. From this pane, click on the Recent button.

4. All the Recent Opened Excel documents will be displayed on the Right pane. Double-click on the document you wish to open.
To access and save the Unsaved data in Excel
To Recover Unsaved Excel Files
Steps to follow:
1. Open the Excel document.
2. Click on the File tab on the Ribbon located on the leftmost side of the screen.

3. Click on the Manage workbook drop-down menu from the Info page, and then click on the Recover Unsaved Workbooks.

4. A folder that contains unsaved files will open. Click on the folder you want to recover, and then click on the Open button.

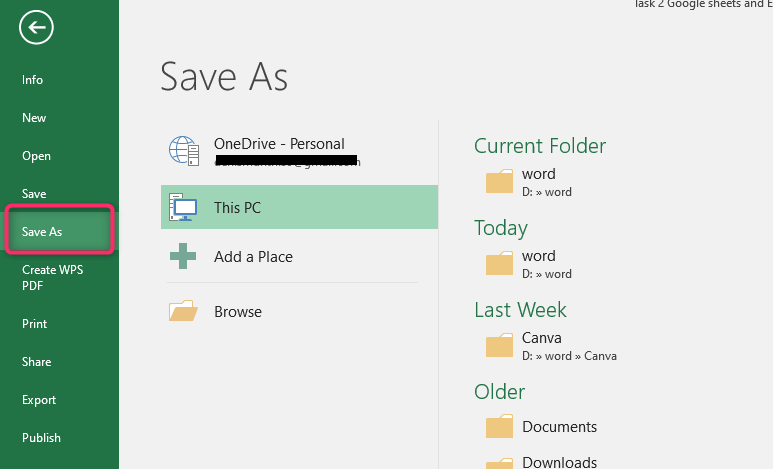
5. After opening the unsaved file, click on the File tab on the toolbar.
6. From the Info page, click the Save As button, selecting where you want to save your document.
To turn on the autosave feature
The Autosave Feature in Excel allows the Excel document to save automatically while you are working on it.
Steps to follow:
1. Open the Excel application.
2. Click on the File tab on the menu.
3. Click on the Options button to open the Options dialogue box.

4. From the box, click on the Save button on the left pane of the dialogue box. Locate the Save Workbooks section, and check the Save AutoRecover checkbox. Finally, click the OK button.
