Excel is made up of numerous empty columns and rows. Sometimes, your dataset may not fill in all the rows of your worksheet, and thus you may need to eliminate the empty bottom rows. Delete blank rows at the bottom of your dataset improves the visibility of the sheet, as only the active cells are displayed. Deleting empty rows also eases the process of printing the worksheet. Several ways and methods can be used to delete blank cells of your dataset.
Using the Format Tool
A] Using the Home Tab
Steps to follow:
1. Open the Excel application.
2. Open the Workbook with your dataset. Click on the empty row immediately after your dataset.
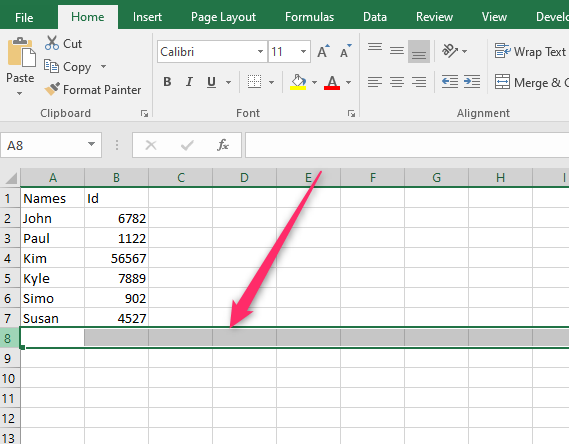
3. Press CTRL + SHIFT + DOWN Arrow key on the keyboard to highlight all the rows below. Then, click on the Home tab on the Ribbon.
4. From the Cells section, click the Format drop-down button. In the Visibility section, hover the cursor over the Hide & Unhide button.

5. From the menu, choose the Hide Rows button; all the rows below your dataset will be hidden.
B] Using the Right Click Tool
Steps to follow:
1. Open the Excel application.
2. Open the Workbook with your dataset. Click on the empty row immediately after your dataset.

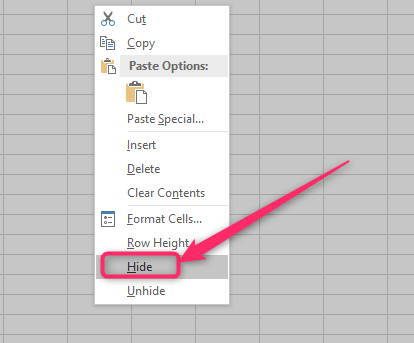
3. Press CTRL + SHIFT + DOWN Arrow key on the keyboard to highlight all the rows below. Then, Right-Click and click on the selected region.
4. From the menu, click the Hide button, and all the selected cells will be hidden.
Using the Page Break Preview Tool
Page Break Preview is a tool that can be used to get rid of blank bottom rows. The Tools cut out all the blank cells and pages.
Here are the steps to use this tool
1. Open the Excel application.
2. Open the worksheet you wish to delete the blank pages. Click where you need to insert the page breaking.
3. On the Ribbon, go to the View tab and locate the Workbook Views section.

4. Under this section, click the Page Break Preview button. That is all. The blank rows of your dataset will be a hidden section in your dataset will be hidden.
Using Keyboard Shortcuts
Steps to follow:
1. Open the Excel application.
2. Open the Workbook with your dataset. Click on the empty row immediately after your dataset.
3. Press CTRL + SHIFT + DOWN Arrow key on the keyboard to highlight all the rows below.
4. Press CTRL+ 9 keys to hide all the selected cells.
To delete blank rows when printing
Steps:
1. Open the Excel application.
2. Open the worksheet you wish to delete the blank pages.
3. Highlight and select the section you wish to print. Leave the blank rows unselected.
4. On the Ribbon, go to the File tab, which is located on the far left side of the Ribbon.

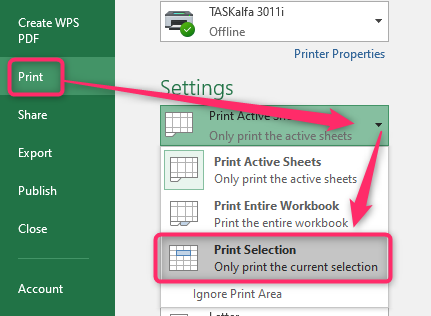
5. From the File screen, click the Print button on the left pane. The Print option will be displayed on the right pane of the screen.
6. Click the Print Active Sheets drop-down button, and select the Print selection button from the menu. Finally, click the Print button. Only the selected part of the document will be printed.