By default, Excel has an in-built Ribbon and tabs to alter and modify the Excel document. However, did you know you added a custom tab in the Ribbon? Luckily, Excel has a VBA tool that allows the use of codes to manipulate and alter the settings of Excel. This article will discuss using the VBA codes to add a custom Ribbon Tab.
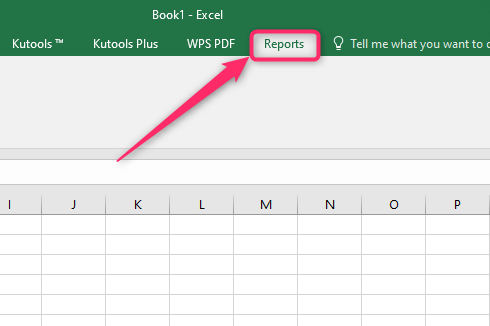
Let us create a tab named Reports with one button. To do so, we can use these methods:
Using the Developer tab
Steps:
1. Open the Excel application.
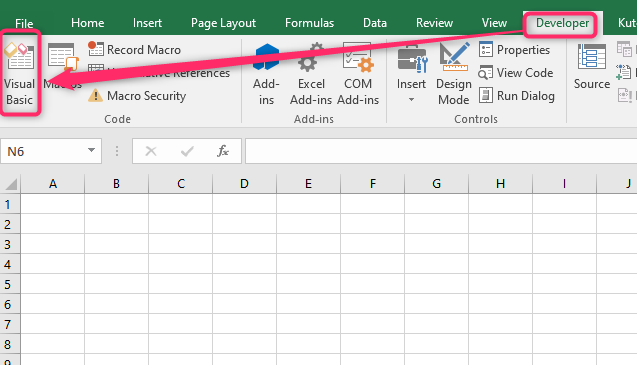
2. Click on the Developer tab on the Ribbon, and then locate the Visual Basic button.
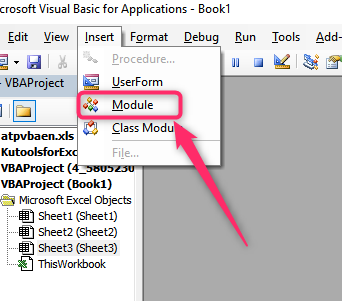
3. In the Visual Basic screen, click the Insert tab on the Ribbon and select the Module button.

4. Type the following code in the empty module.
Sub LoadCustRibbon()
Dim hFile As Long
Dim path As String, fileName As String, ribbonXML As String, user As String
hFile = FreeFile
user = Environ("Username")
path = "C:\Users\" & user & "\AppData\Local\Microsoft\Office\"
fileName = "Excel.officeUI"
ribbonXML = "<mso:customUI xmlns:mso='http://schemas.microsoft.com/office/2009/07/customui'>" & vbNewLine
ribbonXML = ribbonXML + " <mso:ribbon>" & vbNewLine
ribbonXML = ribbonXML + " <mso:qat/>" & vbNewLine
ribbonXML = ribbonXML + " <mso:tabs>" & vbNewLine
ribbonXML = ribbonXML + " <mso:tab id='reportTab' label='Reports' insertBeforeQ='mso:TabFormat'>" & vbNewLine
ribbonXML = ribbonXML + " <mso:group id='reportGroup' label='Reports' autoScale='true'>" & vbNewLine
ribbonXML = ribbonXML + " <mso:button id='runReport' label='PTO' " & vbNewLine
ribbonXML = ribbonXML + "imageMso='AppointmentColor3' onAction='GenReport'/>" & vbNewLine
ribbonXML = ribbonXML + " </mso:group>" & vbNewLine
ribbonXML = ribbonXML + " </mso:tab>" & vbNewLine
ribbonXML = ribbonXML + " </mso:tabs>" & vbNewLine
ribbonXML = ribbonXML + " </mso:ribbon>" & vbNewLine
ribbonXML = ribbonXML + "</mso:customUI>"
ribbonXML = Replace(ribbonXML, """", "")
Open path & fileName For Output Access Write As hFile
Print #hFile, ribbonXML
Close hFile
End Sub
Sub ClearCustRibbon()
Dim hFile As Long
Dim path As String, fileName As String, ribbonXML As String, user As String
hFile = FreeFile
user = Environ("Username")
path = "C:\Users\" & user & "\AppData\Local\Microsoft\Office\"
fileName = "Excel.officeUI"
ribbonXML = "<mso:customUI xmlns:mso=""http://schemas.microsoft.com/office/2009/07/customui"">" & _
"<mso:ribbon></mso:ribbon></mso:customUI>"
Open path & fileName For Output Access Write As hFile
Print #hFile, ribbonXML
Close hFile
End Sub
NOTE:
To change the label of the tab, locate the label section and add you tab’s name.
5. While on the Visual Basic screen, press the F5 key to run the code.
Using keyboard shortcuts to access the VBA screen
Steps:
1. Open the Excel application.
2. Press the ALT + F11 keys to open the VBA screen.
3. In the Visual Basic screen, click the Insert tab on the Ribbon and select the Module button.
4. Type the following code in the empty module.
Sub LoadCustRibbon()
Dim hFile As Long
Dim path As String, fileName As String, ribbonXML As String, user As String
hFile = FreeFile
user = Environ("Username")
path = "C:\Users\" & user & "\AppData\Local\Microsoft\Office\"
fileName = "Excel.officeUI"
ribbonXML = "<mso:customUI xmlns:mso='http://schemas.microsoft.com/office/2009/07/customui'>" & vbNewLine
ribbonXML = ribbonXML + " <mso:ribbon>" & vbNewLine
ribbonXML = ribbonXML + " <mso:qat/>" & vbNewLine
ribbonXML = ribbonXML + " <mso:tabs>" & vbNewLine
ribbonXML = ribbonXML + " <mso:tab id='reportTab' label='Reports' insertBeforeQ='mso:TabFormat'>" & vbNewLine
ribbonXML = ribbonXML + " <mso:group id='reportGroup' label='Reports' autoScale='true'>" & vbNewLine
ribbonXML = ribbonXML + " <mso:button id='runReport' label='PTO' " & vbNewLine
ribbonXML = ribbonXML + "imageMso='AppointmentColor3' onAction='GenReport'/>" & vbNewLine
ribbonXML = ribbonXML + " </mso:group>" & vbNewLine
ribbonXML = ribbonXML + " </mso:tab>" & vbNewLine
ribbonXML = ribbonXML + " </mso:tabs>" & vbNewLine
ribbonXML = ribbonXML + " </mso:ribbon>" & vbNewLine
ribbonXML = ribbonXML + "</mso:customUI>"
ribbonXML = Replace(ribbonXML, """", "")
Open path & fileName For Output Access Write As hFile
Print #hFile, ribbonXML
Close hFile
End Sub
Sub ClearCustRibbon()
Dim hFile As Long
Dim path As String, fileName As String, ribbonXML As String, user As String
hFile = FreeFile
user = Environ("Username")
path = "C:\Users\" & user & "\AppData\Local\Microsoft\Office\"
fileName = "Excel.officeUI"
ribbonXML = "<mso:customUI xmlns:mso=""http://schemas.microsoft.com/office/2009/07/customui"">" & _
"<mso:ribbon></mso:ribbon></mso:customUI>"
Open path & fileName For Output Access Write As hFile
Print #hFile, ribbonXML
Close hFile
End Sub
NOTE:
To change the label of the tab, locate the label section and add your tab’s name.
5. While on the Visual Basic screen, press the F5 key to run the code.